
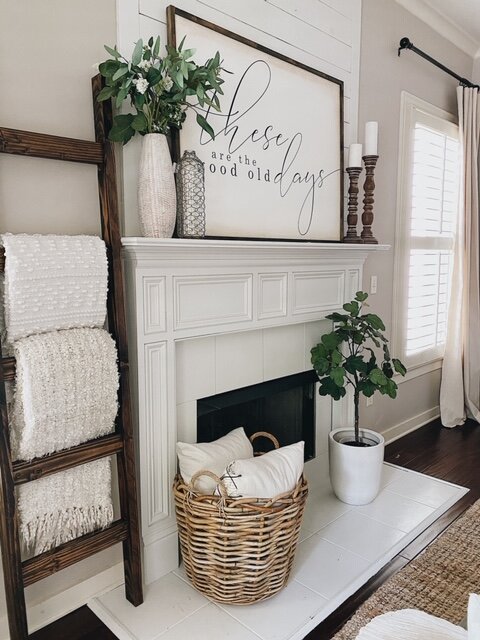
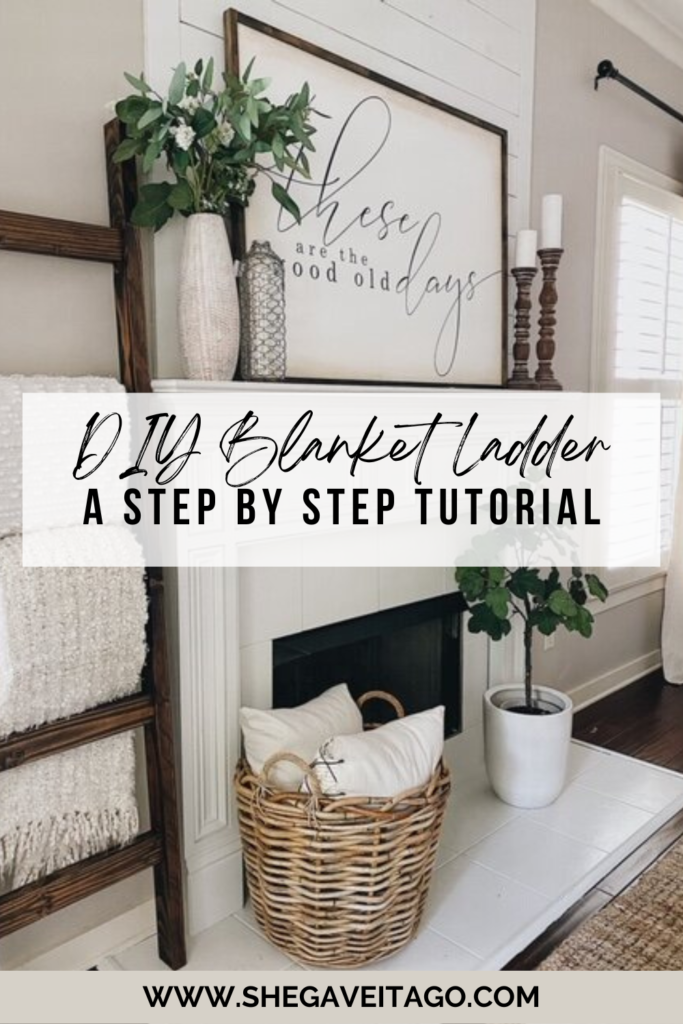
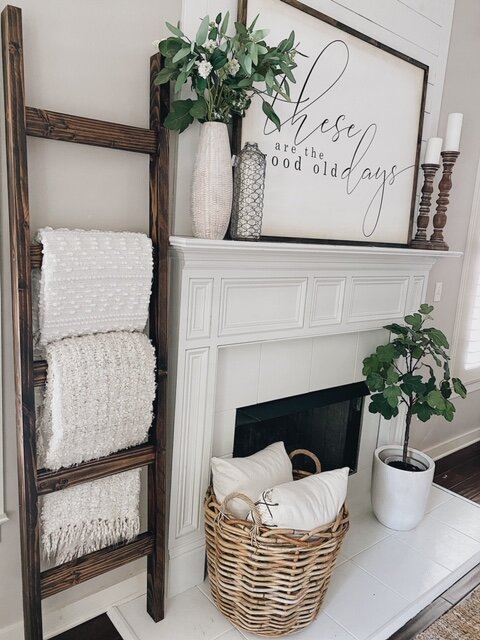
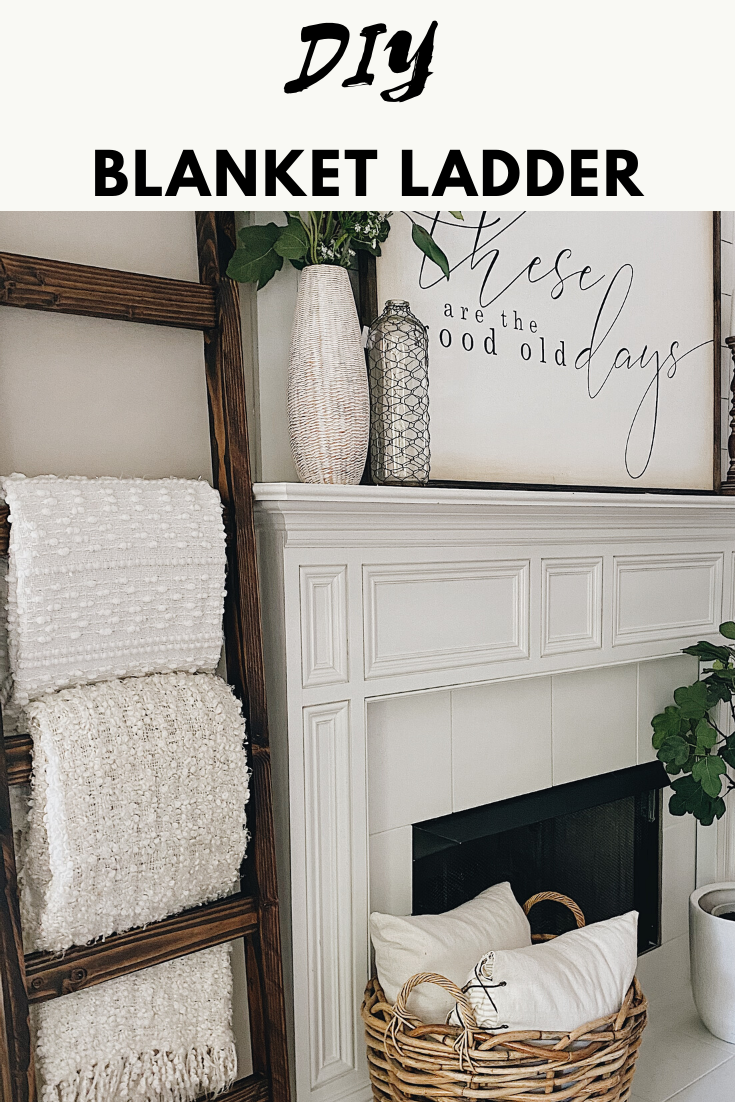
Blanket ladders are a great accent piece to any farmhouse decor scheme. The best part is that they are also an easy DIY that you don’t need a ton of tools or experience to build. This step-by-step guide will walk you through the supplies needed and every step when making a blanket ladder.
Step By Step Guide: DIY Blanket Ladder
PIN NOW, SAVE FOR LATER!
As an Amazon Associate, I earn from qualifying purchases. This post contains other affiliate links too. If you click on these links and buy something, I make a commission at no cost to you.
Blanket ladders are a great accent piece to any farmhouse decor scheme. I am excited to share with you how to make your own blanket ladder in this post.
If you enjoy DIYs, check out these reader’s favorites:
My husband, Andy (who created and built this blanket ladder), shares the full tutorial below.
Blanket Ladder Supplies:
-
3, 8 ft 2 x 4
-
1 5/8 inch screws
-
1/4 inch countersink drill bit
-
1/4 inch dowel
-
The stain of your choice (we used this exact stain)
STEP 1: Cut your beams and your rungs
We cut our beams to be 6 1/2 feet long. Why? Seven felt too long, and six feet felt too short. HA! Seriously, though, you don’t want it too short, especially if you have higher ceilings. 6 1/2 feet felt right to us, so that’s what we went for.
We cut our rungs at 15 inches. (If you use our dimensions, you’ll need five rungs.) You’ll find them in different widths if you look for plans online. We felt like 18 was too wide, and 12 was too skinny. We wanted a chunky look, so 15 was the compromise.
We cut our beams and rungs using a compound miter saw. These cuts are fairly simple, so if you don’t have access to a saw, the folks at the hardware store can cut these for you.
Blanket ladder pro tip: If you have access to a table saw, it’s a nice touch to square off the edges of your 2 x 4s before you cut them to length. 2 x 4 studs you get from the big-box hardware stores have uneven, rounded edges. Squaring off these edges on a table saw is a really nice touch.
It makes them look so clean. It’s not necessary by any means, but it’s a pro-tip that makes a very finished look.
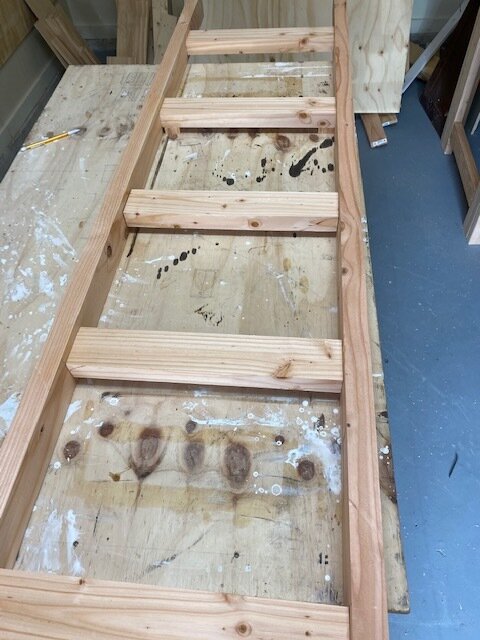
STEP 2: Determine space between rungs
You want to lay this out ahead of time before you start drilling holes. HA. It’s the old adage, “measure twice, cut once,” at work. There’s a way to do this using math, but it gets tricky to explain.
So, how about this: lay your two beams out and lay your rungs out by eyeballing an even amount of space in between each. When you have it close, get a tape measure out and measure in between the rungs to see how close/far off you are from even distribution. Fudge them until you get an evenly distributed space between all your rungs. Mark them and get ready to drill.
NOTE: If you look at our picture, you can see that we hung our rungs in a vertical orientation, not horizontally. It’s up to you how you choose to do this. We felt like a vertical orientation felt more ornamental, while a horizontal orientation felt like we were designing a ladder for a bunk bed. HA!
There is no right or wrong way to do it. But know that the blankets will hang better on vertical rungs. (And people will be less apt to try and climb it!).
Protip: Not enough time to read the full post now? I got you!
You can download this FREE printable guide containing the entire tutorial for how to make this DIY blanket ladder! Plus photos.
I want the FREE DIY Blanket Ladder guide!
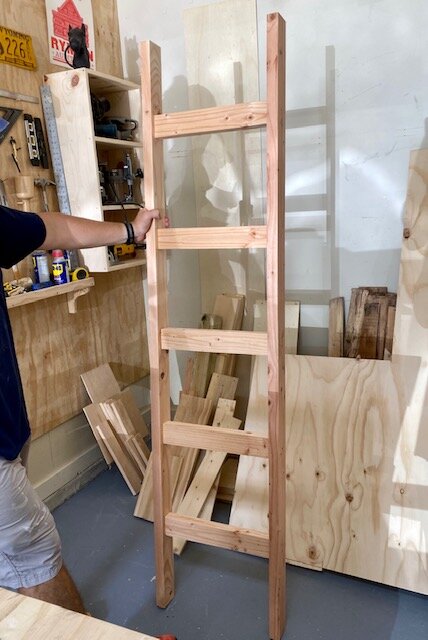
STEP 3: Attach the rungs
You have some options here that we’ll get to in just a minute. Regardless, you want to find the center of your beam, and attach the rungs centered, not flush in the front or the back. (Of course, if you choose to hang your rungs horizontally, they will be flush with the front and back.)
We used a countersink drill bit to attach our rungs. We measured and drilled the hole, added a little wood glue, and screwed one screw on each side. You can leave the countersunk hole exposed, or you can come back in and fill it with a dowel and some wood glue. (Which is what we did.)
But as we said, you have options on how to attach the rungs. Because it isn’t weight-bearing, you don’t have to get too fancy. You could certainly use finishing nails if you wanted.
Or, if you have access to some clamps, you could get by just gluing the rungs (again, provided you have some clamps to hold pressure on it while the glue dries). You could also likely use a combo of wood glue and a brad gun (though you’d probably want 2 to 2 1/2 inch brands to be sure). There are options.
Step 4: Sand your DIY Blanket Ladder
Sanding this ladder is a pretty easy proposition. We used 220 grit sandpaper, and you should be able to do the same. If you have any bad spots you want to sand down, switch to a coarser grain (the lower the number, the coarser the grain), and finish with 220. We used an orbital sander, but on a project like this, you can use a sanding block or simply plain sheets of sandpaper. You don’t have to get too fancy.
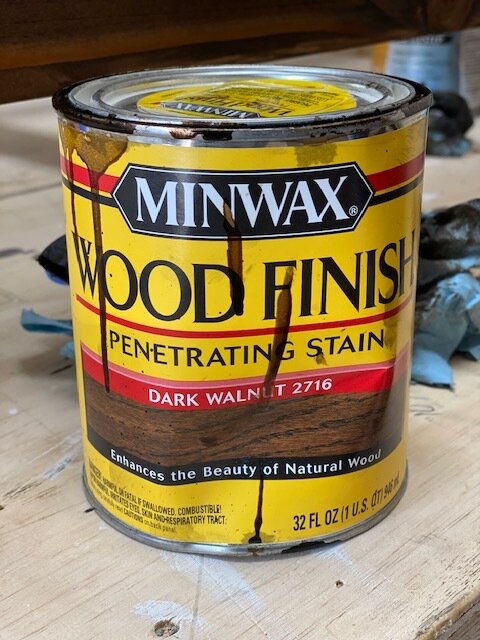
Step 5: Stain your DIY Blanket Ladder
We used a Minwax Dark Walnut stain. If you decide to finish with a stain as opposed to paint, all you need is your choice of stain and a handful of blue shop rags. (We also use latex gloves because this method gets messy.)
All you need to do is bunch up the shop rag, dip it lightly into your stain can, and rub it all over the wood. You don’t need a paintbrush and you don’t have to worry about neatness.
Your goal is to rub it into the wood, wiping up any excess with a clean shop rag. Follow the instructions on your stain for drying times. We found that we needed two coats of stain, which is the norm.
We hope you enjoyed this blanket ladder tutorial as much as we loved sharing it with you! Be sure to send me a photo of your finished ladder if you make one!
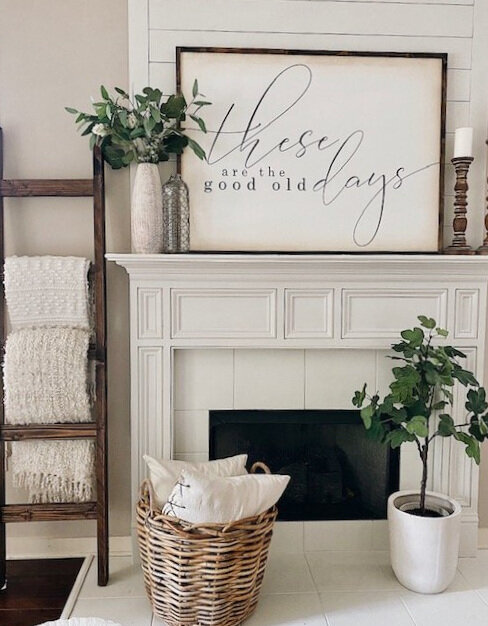
Shop the rest of this space below:
-
“These Are The Good Old Days” sign HERE.
PIN NOW, SAVE FOR LATER
I would love for you to stay in touch by becoming a She Gave It A Go Insider! Get weekly tips, encouragement, special deals, and more!
Sign up HERE and receive a FREE DIY Guide for making any table the perfect chippy paint table.

PIN NOW, SAVE FOR LATER
If you enjoyed this post, I recommend checking these out too:
Leave a Reply


i am debating between a basket at a ladder for front room. You did a great job and i already have the stain. Thank you for the tutorial. your room looks so fresh and inviting
Hi Kellie!
Thank you so much for stopping by and your feedback. I would love to see how yours turns out if you end up making one.
Have a wonderful day,
Brendt
[…] DIY Blanket Ladder HERE. […]
What color are your walls? Thank you
[…] You can find her step by step guide to building your own blanket ladder here. […]
Love the plans but I have a question. Is it attached to the wall.? How do you get a blanket off without it falling over?
Hi Lola,
Thank you so much for stopping by.
We do not have it attached to the wall, just leaning. When we grab a blanket off of it, it stays pretty steadily in place!
Have a wonderful day,
Brendt
[…] Hang them on a blanket ladder for display and easily accessible for use! You can find this DIY HERE on how to make your own blanket […]