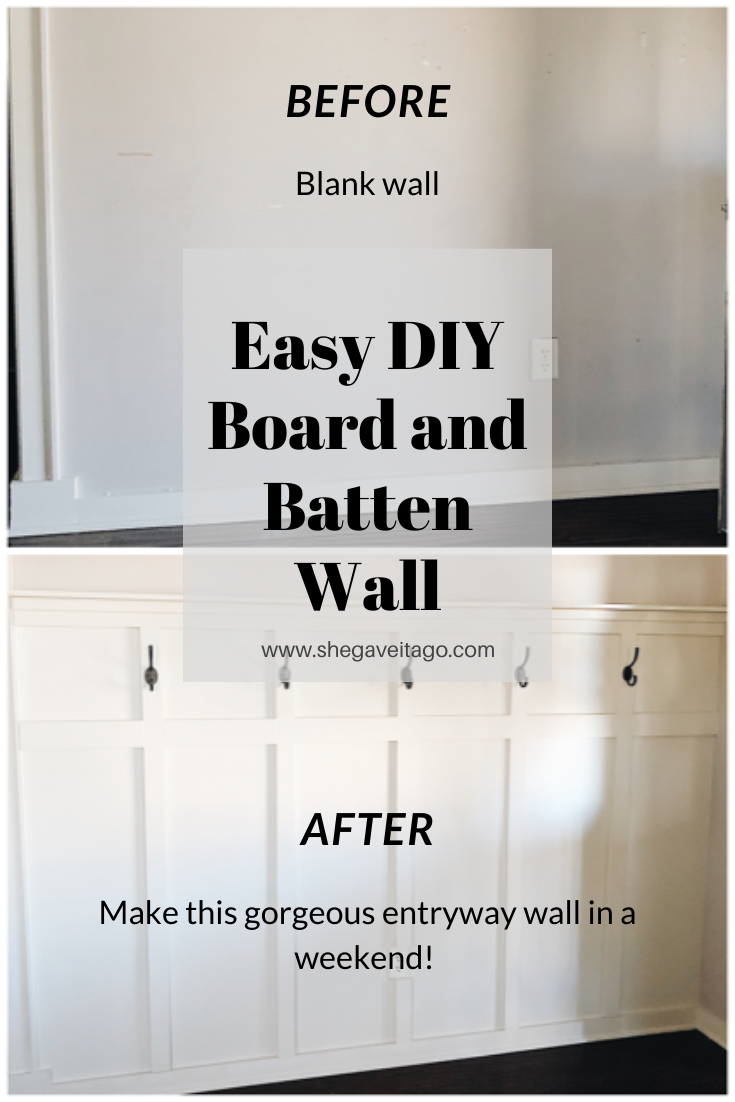
If you’re looking for a fairly simple home improvement DIY that really transforms a space, board and batten is the thing for you. This step-by-step board and batten DIY tutorial will help you know exactly how to recreate this stylish look for your home. The best is that you don’t have to be a carpenter or have a ton of fancy tools to do this board and batten DIY!
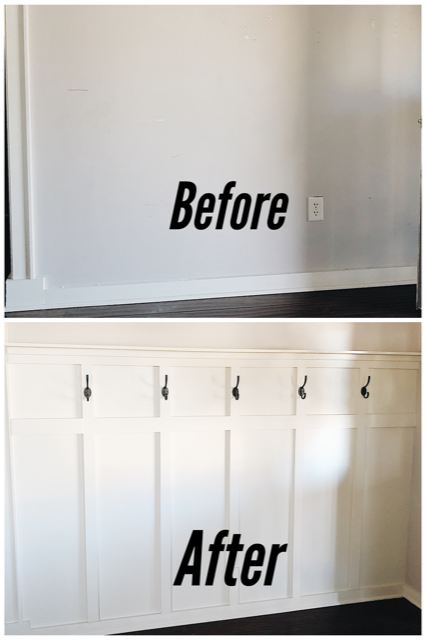
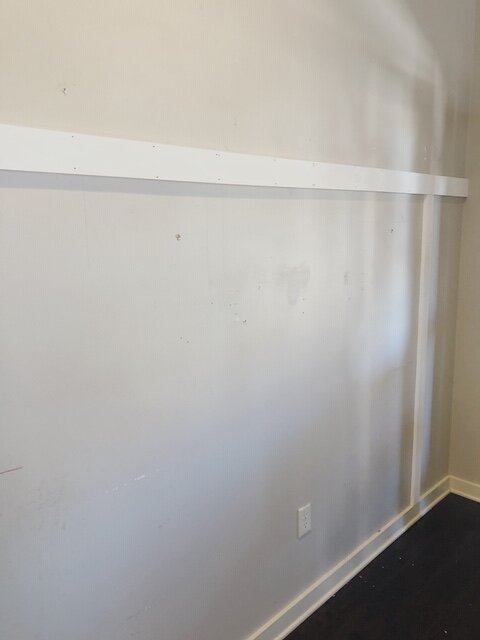
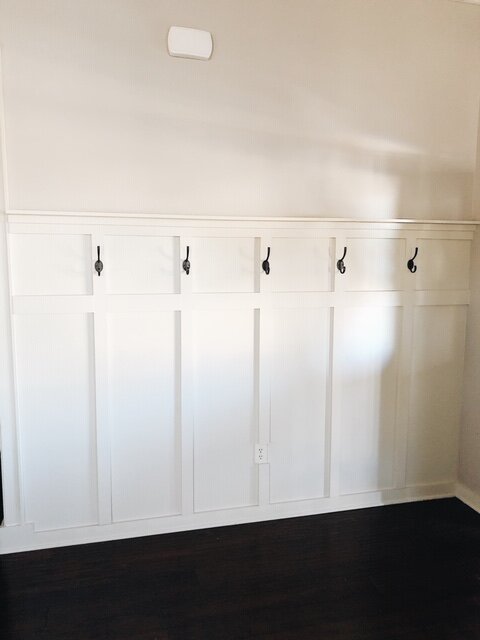
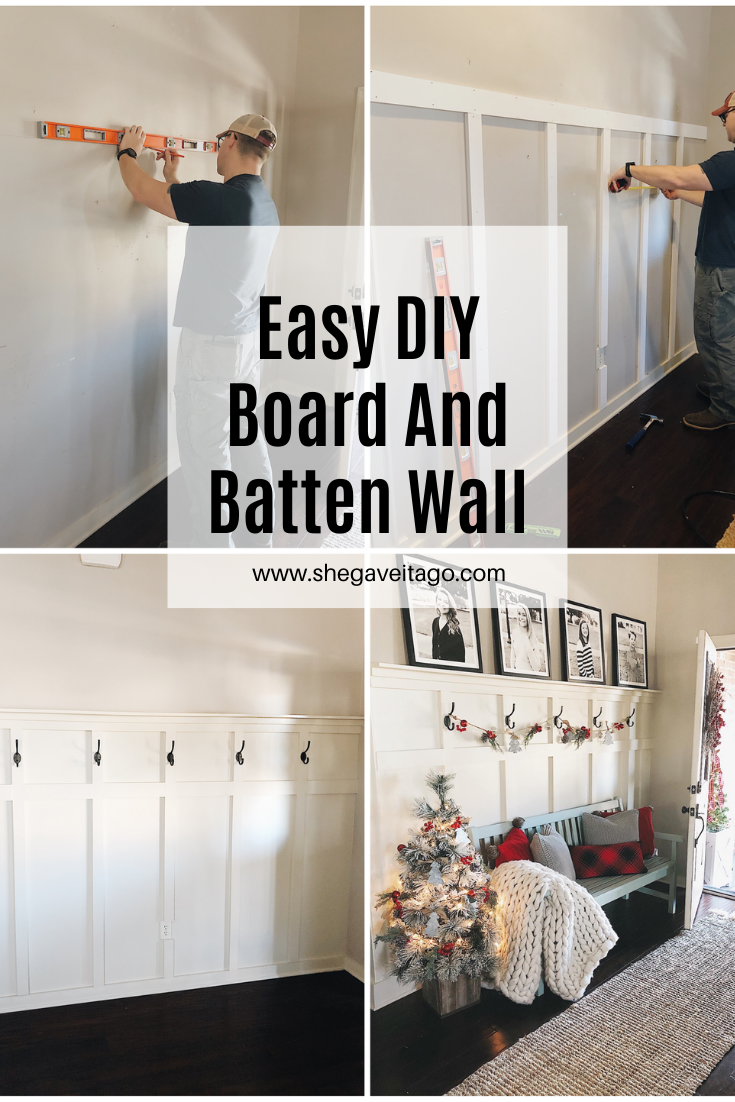
BEFORE
With just a few basic supplies, you can successfully pull this off. So let’s get started on making your board and batten wall.
We loved our entryway before. In fact, it was one of my favorite parts of our home. But I had been feeling like we needed a change. I was thinking about something a little more elegant, and board and batten fit the bill. So, I pitched the idea to my husband, who is the DIY-know-how for She Gave It A Go, and away we went. We did this entire board and batten DIY in one weekend! Isn’t that the best? And as you can see in the before and after pictures, it changed everything.
Protip: As you can see, we added this wall during the Christmas season, and I wanted to share my Christmas Tree Decorating exclusive FREE E-book with you…
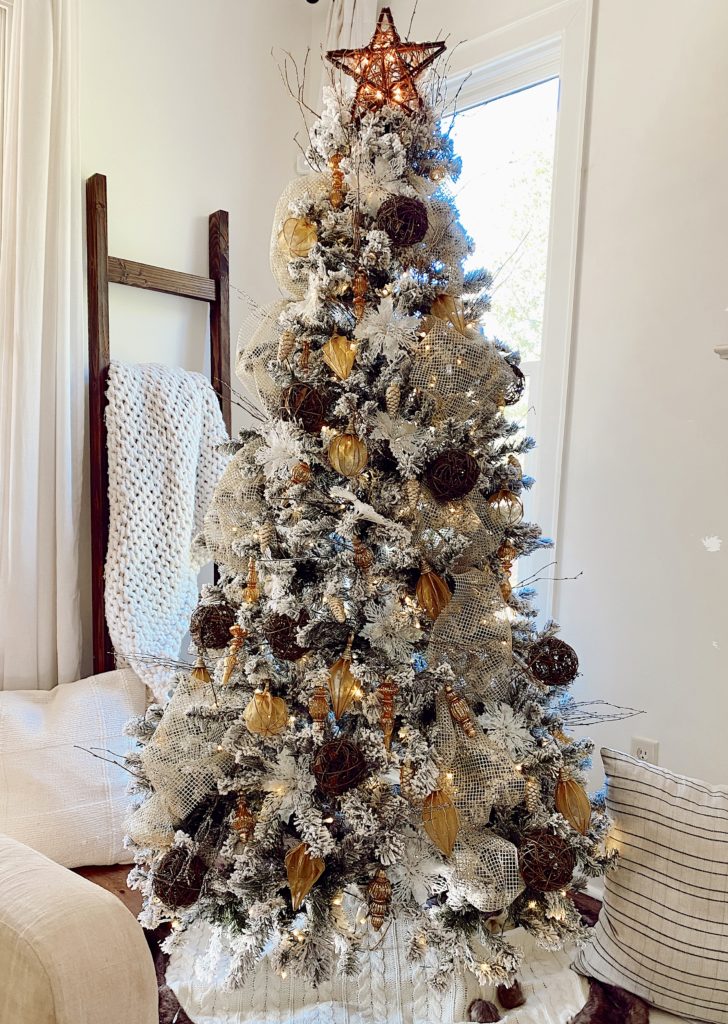
Modern Farmhouse Christmas Tree
Have you ever wanted the kind of Christmas tree that takes people’s breath away but haven’t known where to start? Lights. Ornaments. Ribbon. Tree-toppers. Pulling all this together in a beautiful presentation can frustrate even the most experienced decorators.

How To Decorate The Perfect Christmas Tree
This FREE e-book will take all the guesswork out of the decorating process for you.
In this book, you’ll find:
-
Step-by-step tips on HOW to craft the PERFECT Christmas Tree
-
A complete supply list with every product already linked so you can recreate the EXACT tree you see here!
I want it!
Back to the DIY…
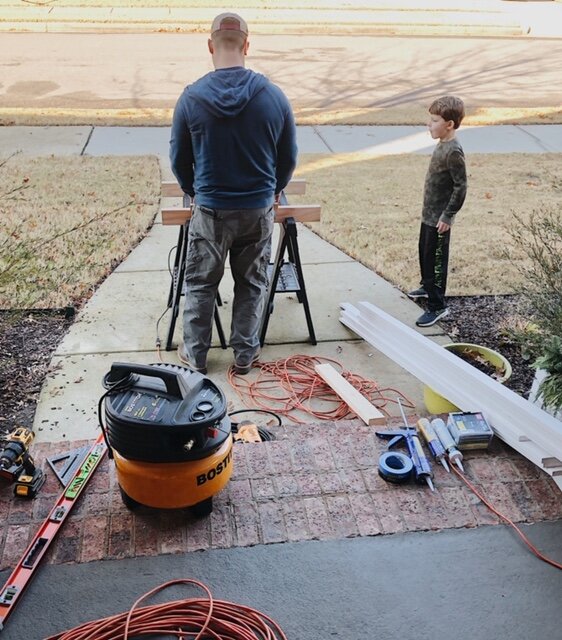
So, as Andy walks you through the steps, we first wanted to go ahead and give you the supply list.
BOARD AND BATTEN WALL SUPPLIES:
-
1 x 4 trim (real wood or MDF)
-
1 x 3 trim (real wood or MDF)
-
Liquid Nail (or similar adhesive)
-
Paintable caulk or spackle (your preference)
-
Puddy knife
-
Measuring tape
-
Level (We used a 4-foot level and a pocket level)
-
A way to cut the boards (We used a compound miter saw. If you don’t have an electric saw, you could always use a hand saw, though for accuracy this is much trickier. You can always get Lowe’s, Home Depot, or a similar big-box home improvement store to cut the boards for you. This is a great option, but you will need to know your measurements before you go.)
-
Painters tape
-
Paintbrush and roller
-
Paint
-
Nail gun or a hammer and finishing nails (If you use a hammer you will probably want to use a nail-punch as well to set your nails slightly below “flush” with the board.) I WOULD NOT advise you relying only on the liquid nail to hang the boards. While it will likely hold adequately, often the boards will sag some before the glue sets and can make your boards un-level.
STEP 1: Measuring (aka, “How Do I Know How To Space out My Battens?”)
The most complicated part of this board and batten DIY is spacing your battens. How do you know how much space goes in between your battens? How do you make sure they are all spaced evenly? It’s actually really simple, but there is math involved so hang with me for a minute. LOL.
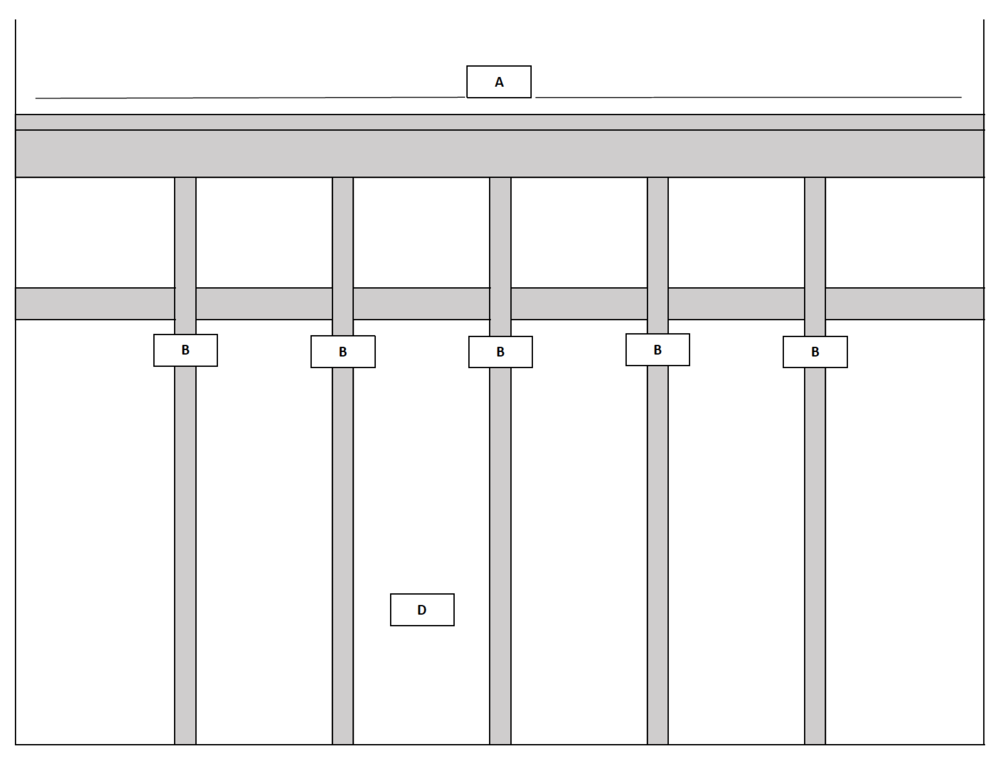
How to space out your battens (I’ve included the diagram below as well):
-
Step A: Measure the wall on which you want to attach the board and batten. (Ex: Ours measured 102.5 inches.)
-
Step B: Identify how many battens you want on your wall. (Ex: We wanted 6 spaces, so 5 battens.)
-
Step C: Subtract the total width of all of your battens from the width of the wall. (Ex: 5 battens X 2.5 inches/piece = 12.5 inches. 102.5 – 12.5 = 90 inches.)
-
Step D: Then divide the number you came up with for C by the number of spaces you want. (Ex: We wanted 6 spaces, so we divided 90 by 6 to get 15 inches/space.) So, for us the space between our battens was 15 inches.
STEP 2: Purchase the Materials for your Board and Batten Wall
Once you know your measurements, you’re ready to purchase your trim and get started. You’ll want to answer the question, “Do I use MDF board or real wood?” We prefer real wood for the texture, but honestly, MDF works fine. The advantage is that if you’re not comfortable choosing wood trim (and knowing how to make sure the pieces you purchase aren’t crooked, bowed, or have bad edges), then you can be confident that MDF is going to be straight with good edges. The only thing to remember is that longer pieces of MDF can be pretty flexible. You’ll want to really make sure they are level all the way across before you nail them.

STEP 3: Hang your top, horizontal board.
You’ll want to start by hanging your top board. You want this pretty high. If you’re hanging it next to a doorway, which we were, you want it at about 2/3rds (or so) the height of your door. Our top board ended up being about 64 inches off the ground.
Measure up from the ground in about 5 or 6 different places, spaced evenly across the wall. Then take your 4-foot level and draw a line across your wall connecting your measurements and creating a horizontal line. This is the line you’ll use as the guide for your top board.

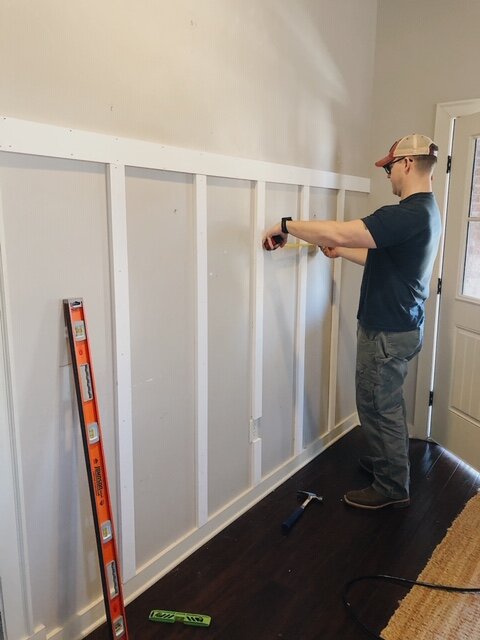
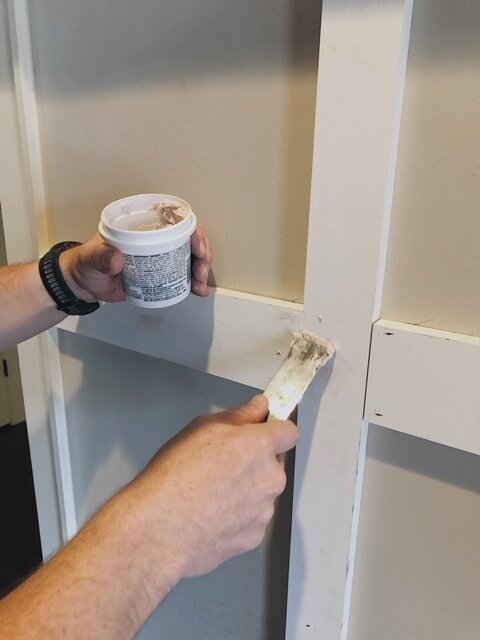
Apply Liquid Nail to the board (like Paul and I are doing here), then afix the board to the wall, making sure it’s level. We used a nail gun using 2 inch brads. Again, it’s fine to use a hammer and finishing nails, but you’ll want to use a nail press to make sure the nails go slightly below the surface of the board.

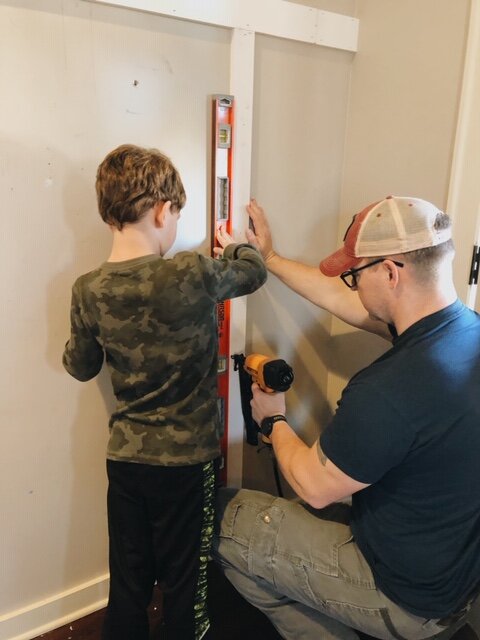
Step 4: Hang the first batten.
You’ve already figured out the space between your battens using the formula in Step 1. Again, for us, our distance between battens was 15 inches. So, measure 15 inches from the wall, put the Liquid Nail on the back, use your level to make sure you’re square, then affix the batten.
Repeat this step for the rest of your battens.
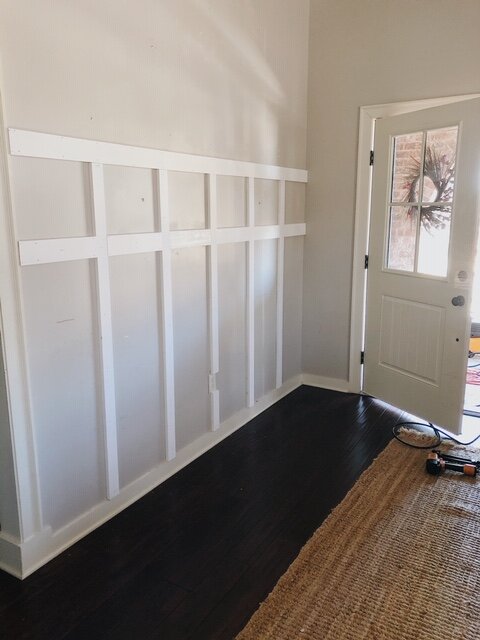
Step 5: Affix the row of horizontal cross-trim
To achieve the look you want, you’ll want to place your horizontal cross-trim fairly high up on your battens. You want them more than 2/3rds of the way up. But you don’t want them TOO high. It’s sort of a preference thing. We tried making them perfectly square, meaning we came down 15 inches from the top, but it wasn’t really the look we wanted. We then went for 12 inches, but it felt too tight. So, we landed on 13 inches from the top board and it felt right. Play around it until you get the look you want.
The length of your cross-trim boards will be the same as the space between your battens. Again, for us, that was 15 inches. REMEMBER, the cross-trim is 1 X 4, not 1 X 3. (In other words, it’s the same width as your top board, not your battens.) Then affix the board using the same method you used for the previous boards, making sure each is level.
Step 6: Attach a top picture ledge to your board and batten wall (If you want)
We wanted a picture ledge. You don’t HAVE to add one. But it’s pretty easy and brings a different design element into your space. To do so, you’ll need to add two more boards.
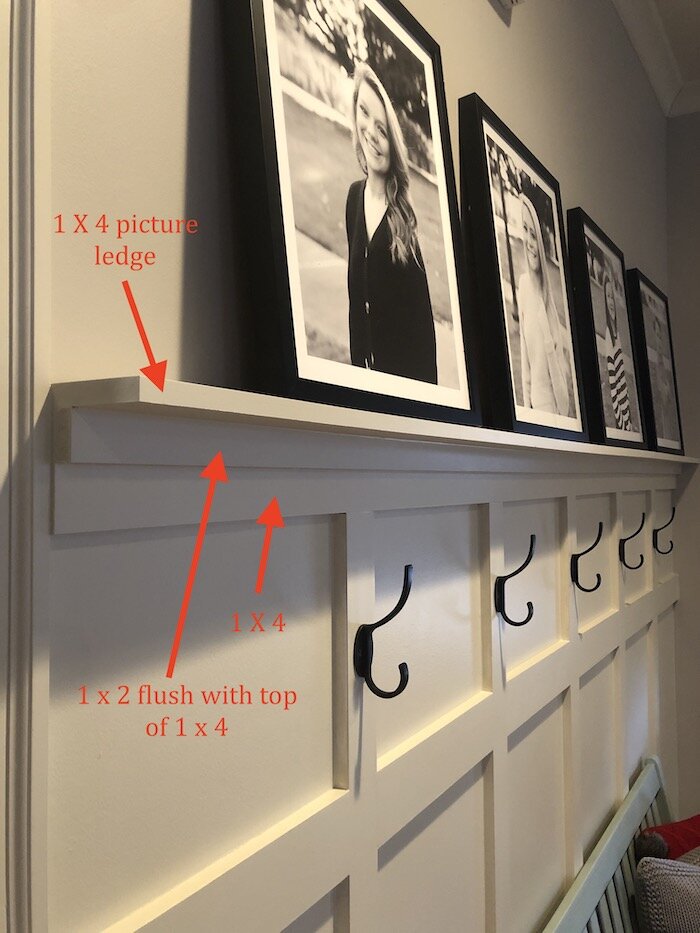
You’ll want to add a 1 x 2 to your existing top horizontal board, flush with the top in order to provide both a little support for your picture ledge and give you more area to nail your picture ledge board. Then, add a 1 x 4 as your picture ledge.
At this point, you’re done with the “construction” phase of the board and batten wall! Well done!
Now you’re ready to begin the prep work for the paint.
Step 7: Paint-prep and painting.
I actually use both spackle and paintable caulk to prepare my surface for painting. I use spackle in the nail holes because I believe it does a better job of hiding the holes when painted. I use the caulk to fill any small cracks left between boards.
So, I spackled all the nail holes and any divots I saw in the wood.
Then, everywhere the wood touched the wall, I caulked so as not to see any gap between the wood and the wall. I used a wet rag to clean up any caulk.
I used painters tape and taped the floor and the existing wall.
After about 12 hours, I came back and sanded down the spackle, wiped down the wood with a damp cloth to collect any dust from the spackle, and painted. I used a combination of brush and roller. I brushed around the edges of the trim to “tie in,” and used the roller for the big spaces.
Step 8: Hanging the coat hooks.
Board and batten is beautiful on its own. But if you can find an excuse to hang coat hooks on it, do so! It has such a strong design effect. The hooks really tie the space together well.
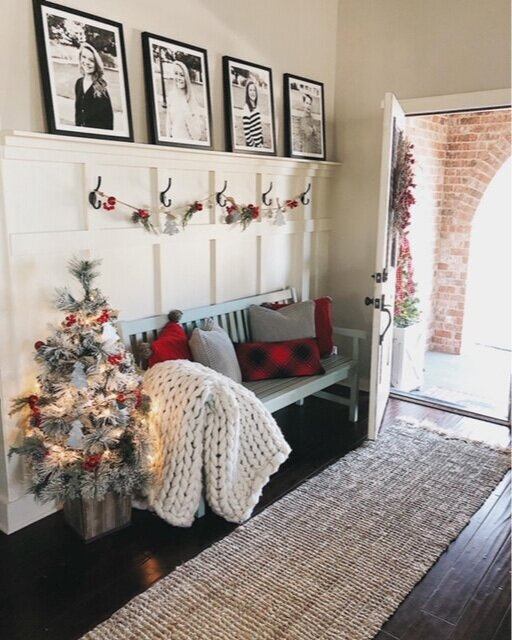
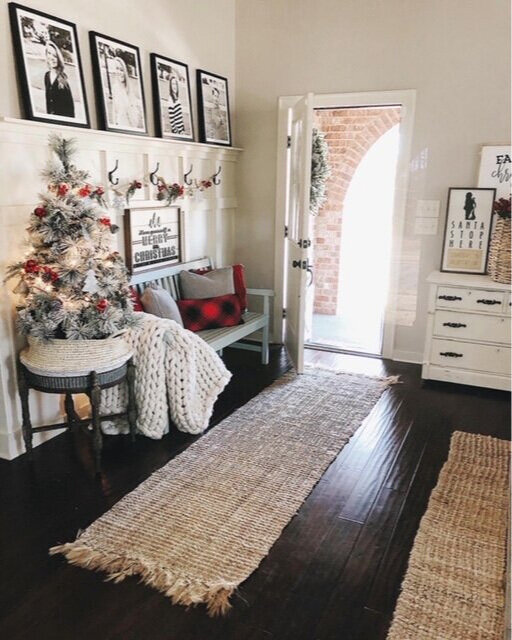
Step 9: Decorate your board and batten wall
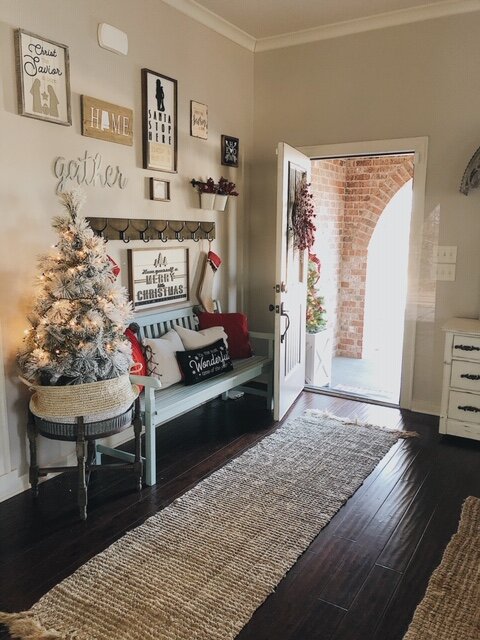
It’s Brendt here now. LOL! And, this is my favorite part. We had recently received these gorgeous framed photos from Minted and love having the personal touch of our children here in our entryway. You can see that it is Christmas time when we completed this project, but there are a few simple elements that will stay throughout the year: a bench (or console table), pillows (can change out seasonally), and a blanket to drape across the arm of the bench. I also recommend a runner to designate this as a true entryway if you have an open concept plan like we have.
Shop This Look
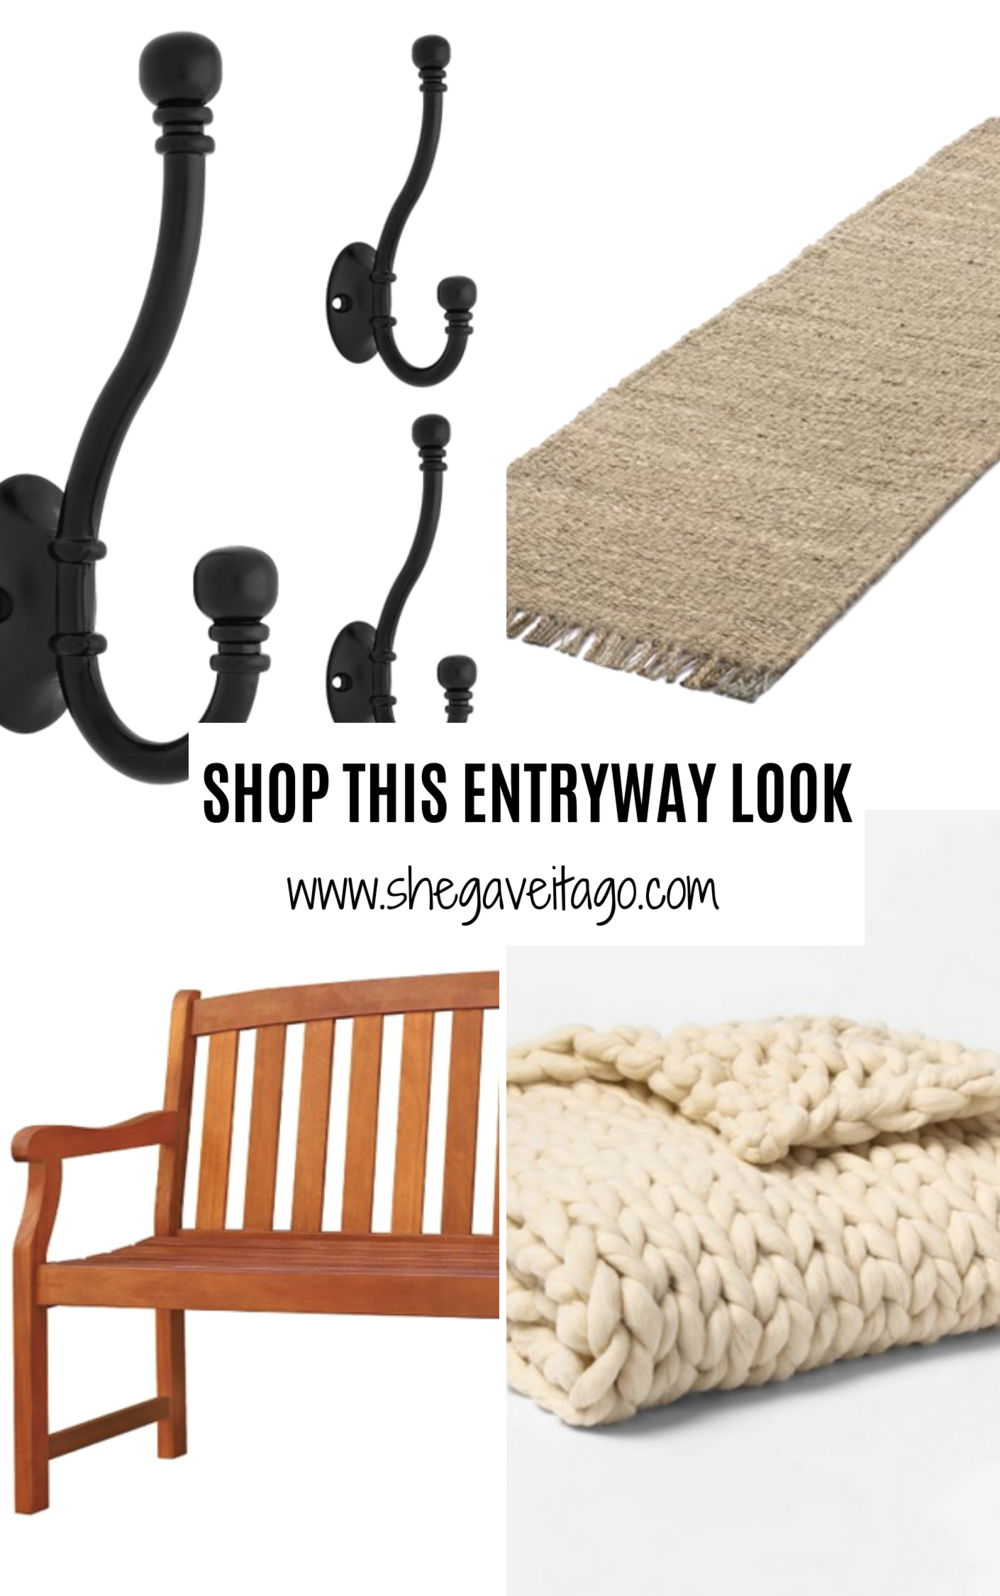
5pk Ball End Coat & Hat Hook Flat Black – Franklin Brass/ Chunky Reversible Handwoven Flatweave Beige Area Rug/
Extra Chunky Knit Throw Blanket White / Wood Bench / The Corrugated Cottage Side Table
All done! What do you all think of our board and batten wall?
This is one of many upcoming DIY projects we are going to be sharing with you in the upcoming months. Andy will be joining alongside me as we share these with you all; we can’t wait.

Love this so much! So on the ledge I am a bit confused…. you put the 1×2 flush on the board and then use use a 1×6 as the ledge so the ledge sticks out 6 inches? Sorry trying to visualize the ledge and 6 inches seems like it would stick out too far
For installing the hooks, what screws were used and would there be issues going through the wood and into the drywall (thinking about splitting the wood). Also want to make sure the hooks are strong enough. Thanks!
What finish paint did you use? Semi-gloss? Eggshell?
Since the boards may not be over a wall stud and just glued on and nailed with the finishing nails; will the hooks be strong enough to hold jackets and or book bags?
We are doing this project now!
Where did you get your Christmas garland?! Looks great!
[…] want to try and figure out how many battens/vertical pieces you want to attach to the wall. This blog post has a great overview on how to determine this along with a […]
[…] Easy DIY Board And Batten Wall […]
[…] The board and batten wall was a DIY you can find here. […]