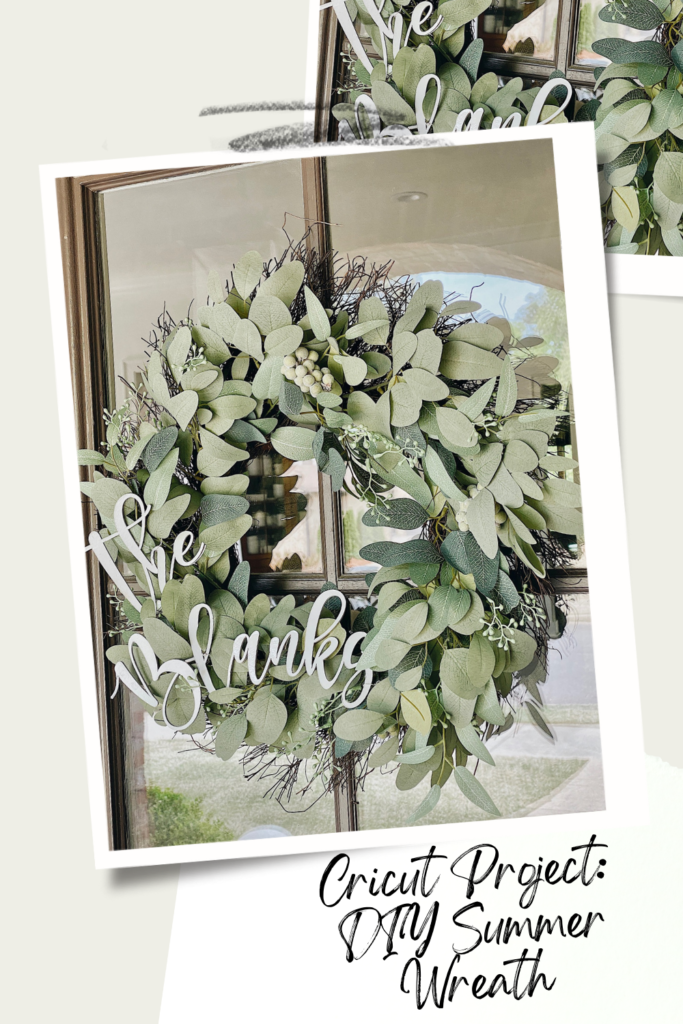
This summer wreath is so pretty for your front door! By using a Cricut machine, you can add your own touch to create a unique and personalized wreath for summer. Scroll down to check it out.
PIN NOW, SAVE FOR LATER!
This post on the Cricut project, DIY Summer wreath contains sponsored links. The items featured and linked in this post were all provided by JOANN; all opinions and reviews are my own.
If you have followed along with me recently, you may have seen that I’ve been trying my hand at Cricut projects. There are 1000s of ways you can use this machine!

Personalized wreath for Summer
I shared how to create a personalized collegiate sweatshirt HERE, and DIY paper graduation caps HERE.
Each of these projects were so meaningful to my graduating daughter.
DIY Summer Wreath
Today, I am excited to share with you a new DIY Cricut project, that creates a lovely, personalized wreath for your home this Summer.
Are you ready to get started?
JOANN Cricut Projects: DIY Summer Wreath

Cricut Project: Summer Wreath
Supplies for the DIY Summer Wreath:

PIN NOW, SAVE FOR LATER!
- Cricut Maker
- StrongGrip Cutting Map
- Cricut Healing Map
- Cricut Maker Knife Blade
- Cricut Starter tool kit
- Floral Wire
- Wreath
- White Spray Paint
- Basswood Sheets
- Command hook
Directions for the DIY Summer Wreath:
Cricut:
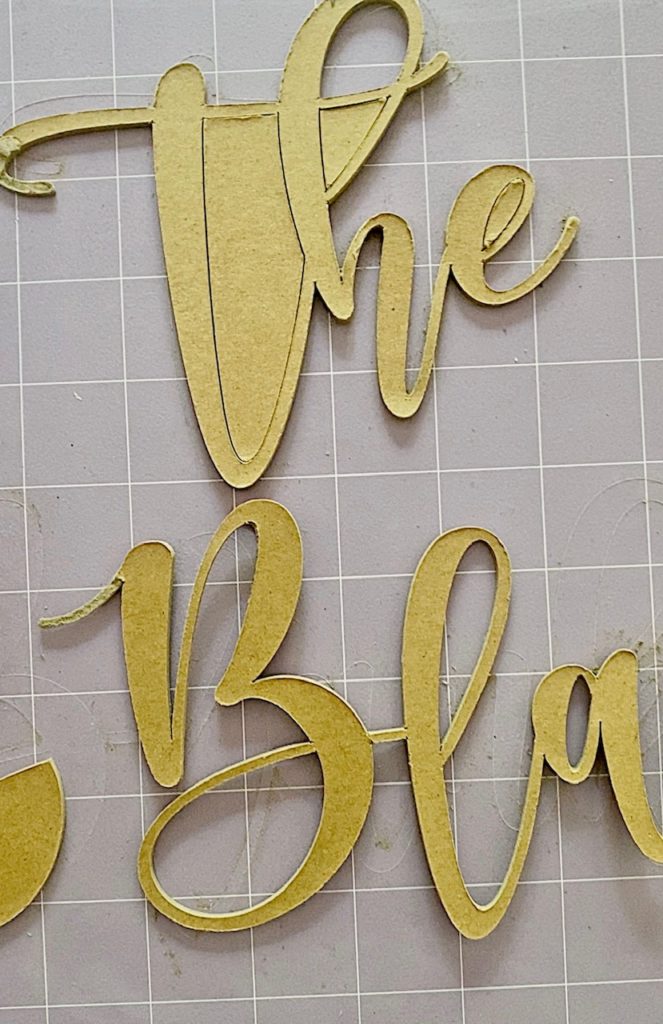
First, grab your StrongGrip mat, a sheet of basswood, masking tape, and the knife blade Cricut tool.
Next, choose your favorite font on Cricut Design and get to designing.
Then, stick your basswood on the StrongGrip mat, and secure the sides of the basswood to the mat with masking tape.
Follow the instructions on your Cricut design regarding basswood. Allow at least an hour for the Cricut to cut the basswood.
Cricut project
Once the cut is complete, use your weeding tool to pop your letters out.
Once you are done with the personalized name part of the project, it is time to spray paint.
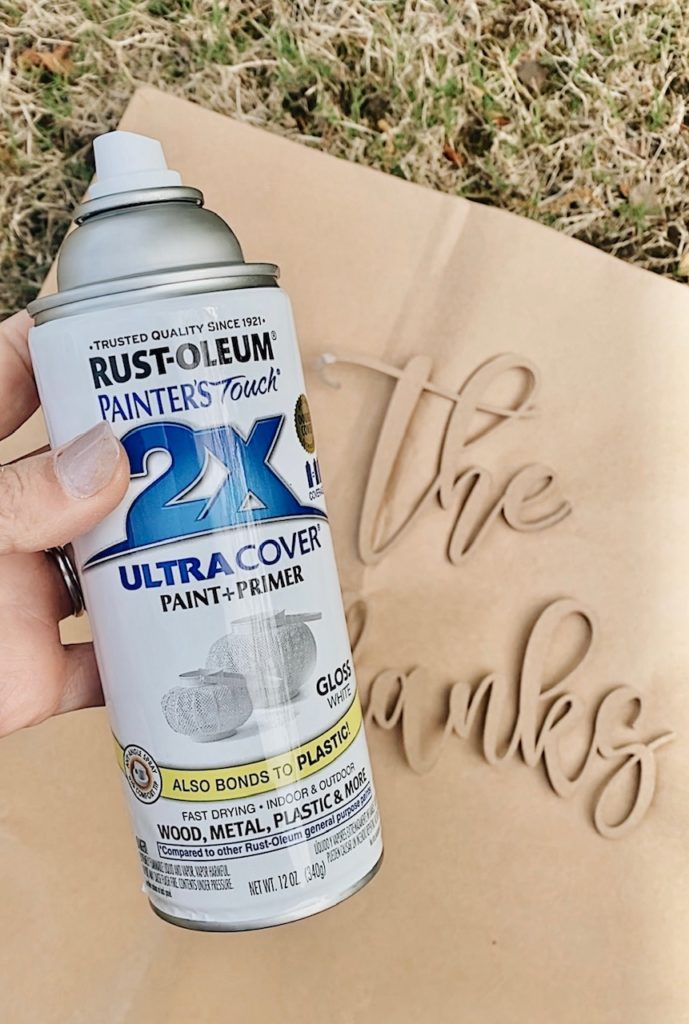
Spray painting the name
Protip: Spray paint in a well-ventilated area! I always spray paint outside, and just kraft paper to place my project on.
I love the 2x coverage Rust-oleum spray paint; it just took one coat!

Name drying that has just been spray painted
Once it dries, you will attach the word(s) to your wreath using floral wire.
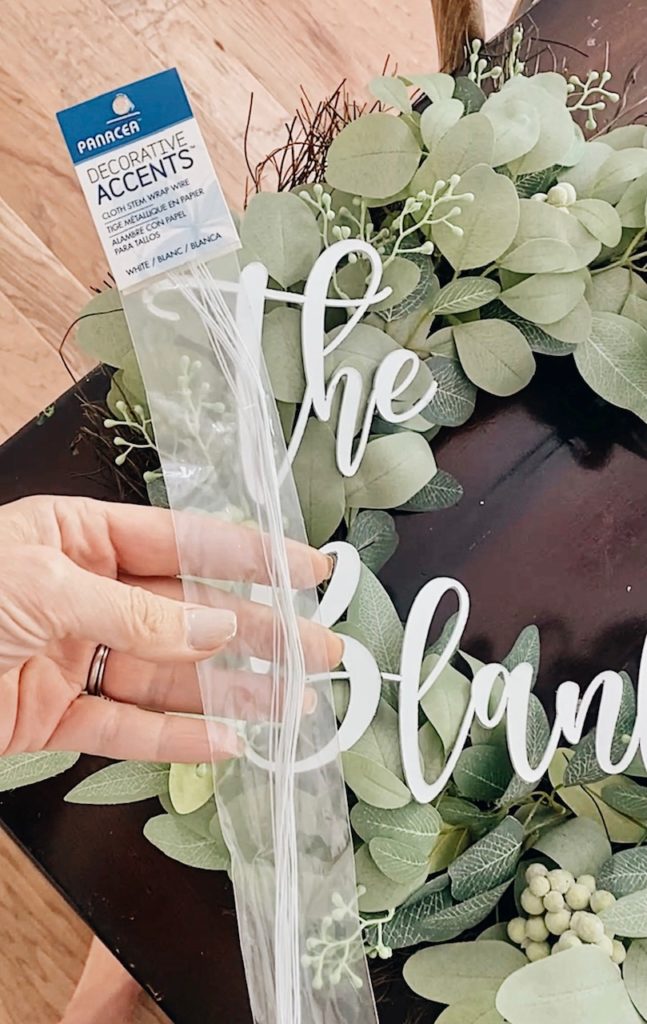
Floral wire to attach name.
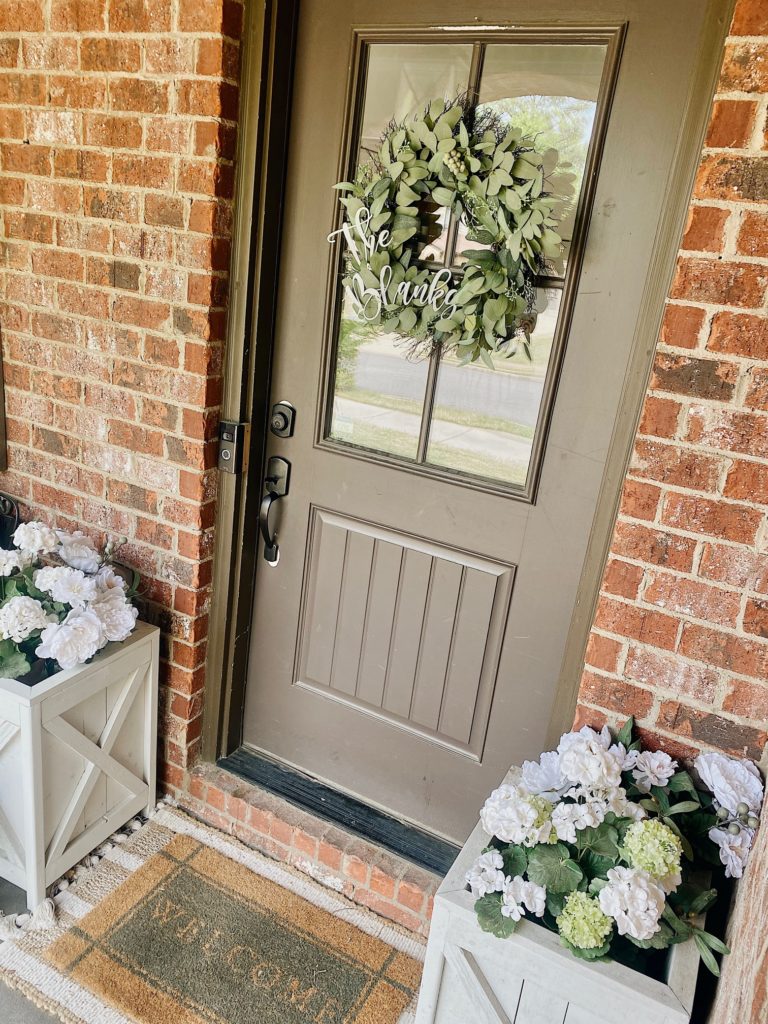
And, you are done! Place the wreath on a command hook and enjoy!
Are you ready to get started on creating this DIY Summer wreath? Let me know how you plan to personalize in the comments below.
If you enjoyed this post, I recommend checking out these posts too:

PIN NOW, SAVE FOR LATER!

Brendt,
Such a cute idea. I’m going to share a link on my Sunday post. Thanks for the inspiration.
Oh, how kind, thank you, Rachel! I am thrilled to hear that you love the idea.
Grateful for you my friend,
Brendt
[…] DIY Summer Wreath […]
[…] She Gave It A Go / JOANN Cricut Projects: DIY Summer Wreath […]
I love how this turned out, Brendt. It’s so stinkin’ cute! I’m going to share a link to your wreath with my readers tomorrow as part of my week in rewind recap. Hope you have a wonderful holiday weekend!
[…] Brendt shared How to Make a cute DIY Summer Wreath on this post. […]
[…] Give one of your old wreaths a new look with this easy DIY project. […]