[This post contains sponsored links. The items featured and linked in this post were all provided by JOANN; all opinions and reviews are my own.]
When I was a child, I remember my parents bringing home a real Christmas tree and setting it in a bucket of a water and Sprite mixture. (This was supposed to prolong it’s longevity; who knows if it actually worked! LOL) I couldn’t wait for the day, though, when it would be brought inside, lights added, and ornaments hung on it. My parents collected their ornaments from places they traveled over the years and also used ones that had been passed down to them. Decorating the tree was always a fun family tradition at our home. We continue to enjoy this tradition with our family too.
Although we don’t use real trees like my family did growing up (our children were allergic to them we found out the first year, lol), we put up at least one tree each Christmas and decorate it together. From lights to ornaments, and ribbons to garlands, decorating a tree is a fun family tradition.
Over the years, our tree collection has grown. I want to share one of the three trees with you, and tell you how to achieve the farmhouse look you’re going for.
To create my farmhouse style tree, I utilized seasonal home décor and florals from JOANN. They had a large breadth of selection to consider that allowed me to really achieve the look I wanted.
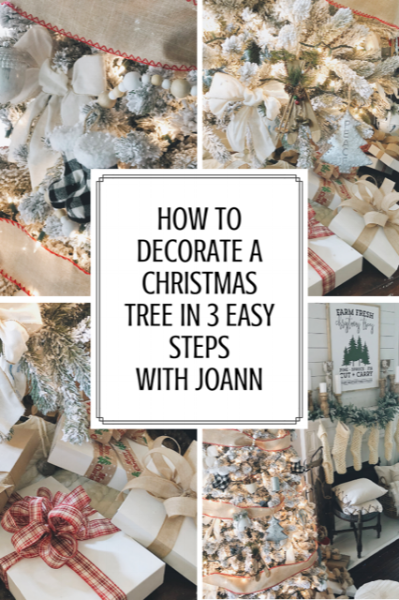
Let’s talk about how we created a beautifully styled Christmas tree in these 3 easy steps!
-
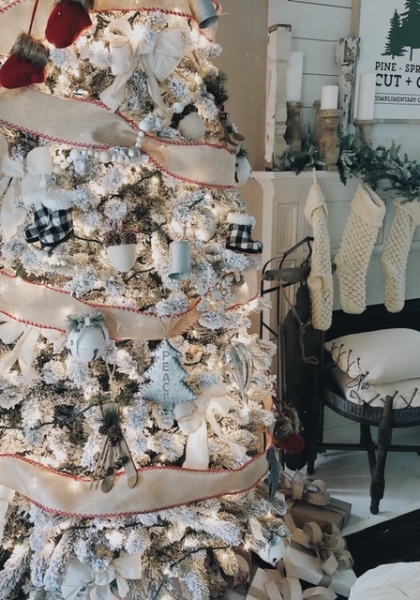
Ribbon, Garland, and Bows
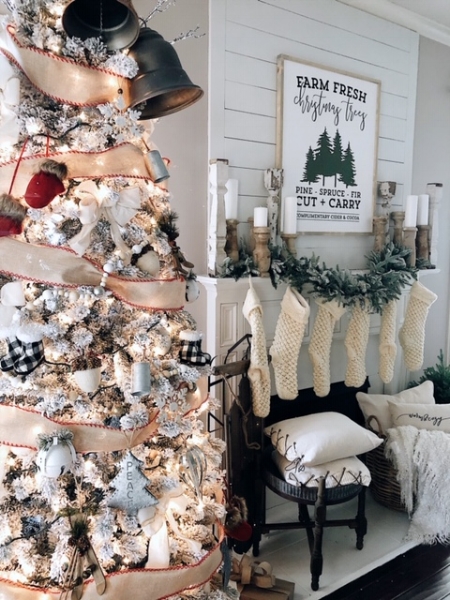
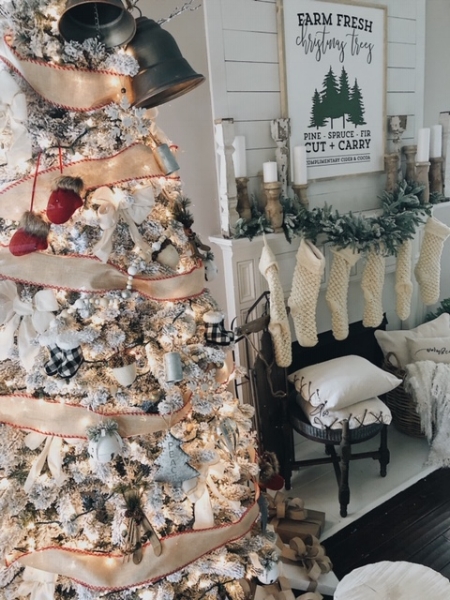
If you are like me, I prefer to have trees come pre-lit with lights, so if you do not have a tree with lights already on them, that would be your first step. But since mine already had them, I first used this beautiful burlap style ribbon and draped it horizontally across our tree starting at the top then moved down to the base.
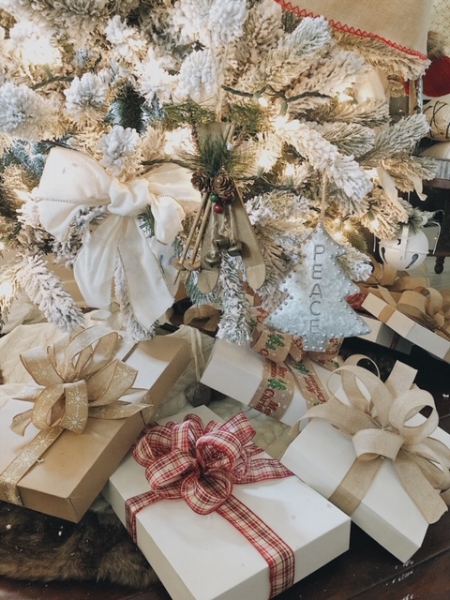
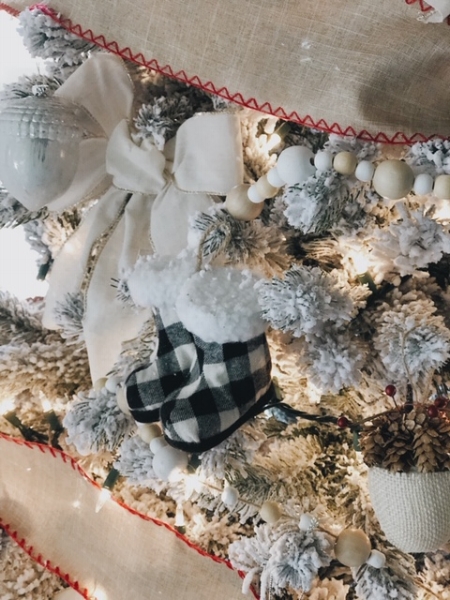
I then added these cream bows by grouping pairs of three over my tree. Bows and ribbon add a soft texture to the tree and I love the nostalgic feeling they add.
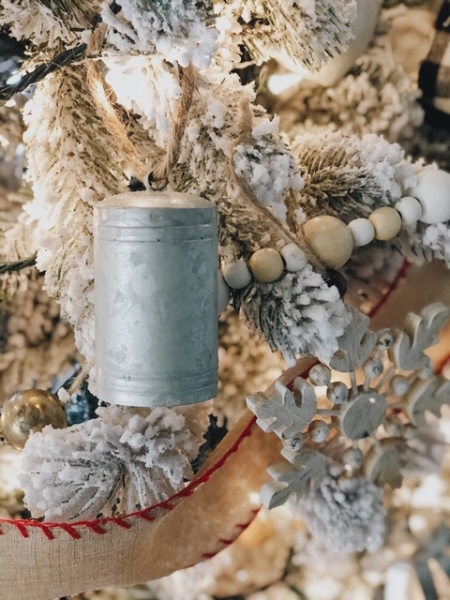
Next, I draped this (similar) wood bead garland (I used three packages to help cover the tree and get the look I wanted) over the tree branches. This wood is a great contrast in colors and material against the soft ribbon and bows. I love mixing various elements to give it a lovely look overall.
2. Ornaments
For the ornaments, I wanted to utilize textures and pieces that represented farmhouse style to be inline with the rest of my Christmas decor. When hanging ornaments, you want to start at the top and hang the smaller and more fragile ones there. Then continue to apply this principal as you move down the tree, using medium sized ones towards the middle and the largest, least fragile on the bottom of the tree.
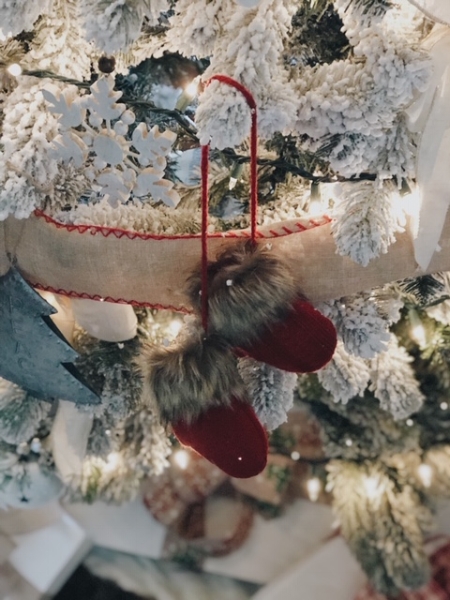
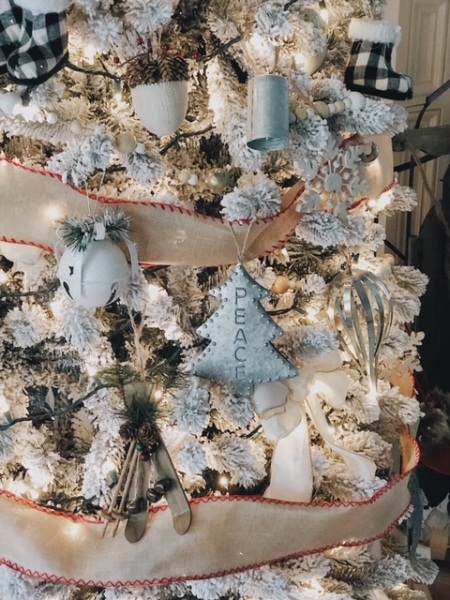
The ornament selection at JOANN was plentiful and allowed me to choose ornaments that fit within my Christmas color palette and provide textures like galvanized metal, wood, rustic designs, white snowflakes, and other rustic/farmhouse style themed items. I especially loved the buffalo check rain boots and the metal bells.
Here are the ornaments (several of each) I used for our tree:
Woodlands Lodge Mittens Ornament
Woodlands Lodge Pinecone Ornament-Cream
Woodlands Lodge 3-piece Jingle Bells Ornament
Christmas Boot Ornament-Black and White Check
Woodlands Lodge Wood Snowflake Ornament
Arctic Frost Bell Ornament-White
Woodland Lodge Snow Ski Ornament
Woodland Lodge Galvanized Teardrop Ornament
Woodland Lodge Galvanized Bell Ornament
Christmas Acorn Ornament-Metallic
Woodland Lodge Galvanized Tree Ornament- Peace

3. Tree Skirt and Wrapped Presents
It can be easy to forget about the base of the tree when it’s so exciting to see all the twinkle and layers of holiday cheer on the tree. But don’t forget, the bottom of the tree needs some love too. I enjoy adding a tree skirt, like this one here from JOANN. I am sucker for anything chunky and cable-knit (plus fur!).
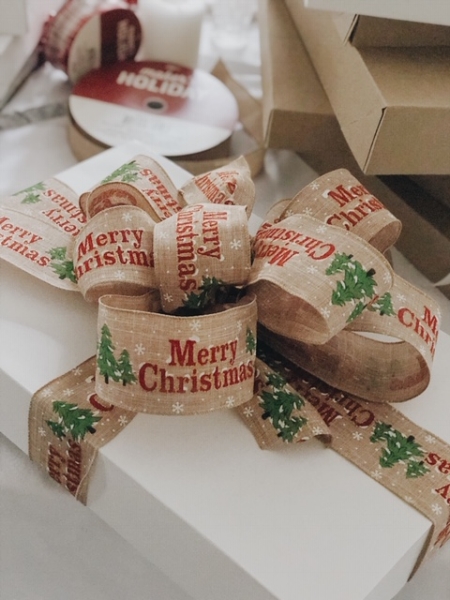
Even if you haven’t finished up all your Christmas shopping, adding some wrapped presents to sit on top of the tree skirt will make the tree space complete. Try making it simple by using these boxes and any of these three ribbons I used (found here, here, and here )for a festive yet simple farmhouse style look. I shared step-by-step instructions on the JOANN app on how to create pretty and fluffy gift box bows like the ones you see here! The best gift bows are made with light-weight, wired ribbon like ones I linked above, They do not take much time, nor expert skill level, yet create a lovely impact for the base of your tree, and of course ultimately those who you are gifting the present.
BONUS: Add some of these stems to the top of your tree as an alternative to a tree topper.
Farm White Birch With Pinecone Bush
Blooming Holiday Snowy Berry Bush
Christmas Farm Birch Branch Bush
I hope that you enjoyed learning these three steps to decorating a Christmas tree. It doesn’t have to be costly or too complicated to make your tree one that is enjoyed by your family and guests. By implementing these three steps, your tree is sure to be a sight that will bring your cheer throughout the holidays.